Manually Creating your Organization
If you do not have access to a directory server or CSV file to automatically import your organizational structure, you can manually create your groups and users.
Adding Groups
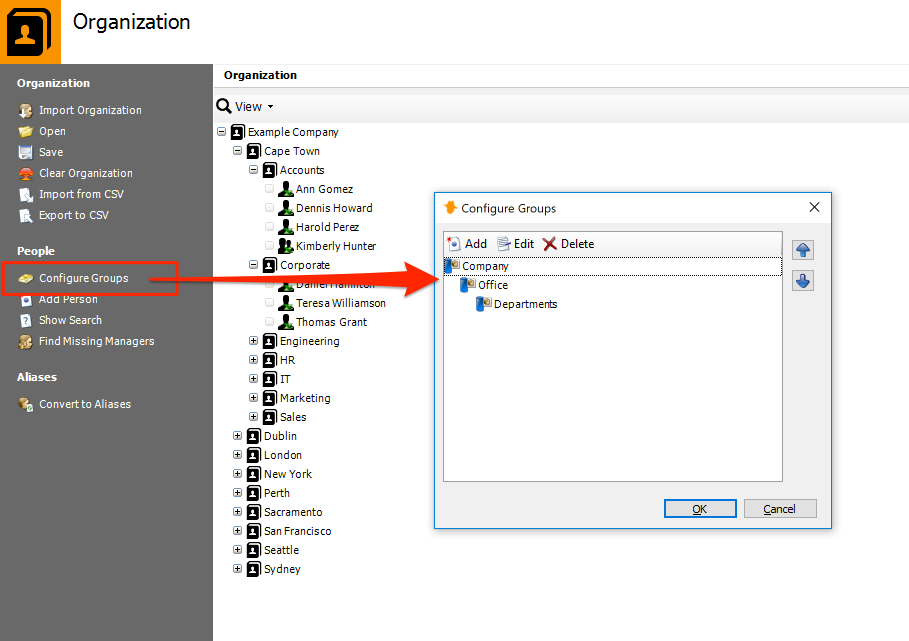
The 'Configure Groups' option allows you to manually create user groups. These groups should reflect your organizations structure, for example Country, City, and Department.
To do this:
- Click Configure Groups
- To add a new organization group click Add
- Enter the name of the new group and click OK
- Use the Up and Down Arrows to rearrange your groups as required
Adding People (Users)
The 'Add Person' option allows you to add individual users to your organization tree.
To do this:
- Click Add Person.
- Enter the display name for the user in the first entry box.
-
Enter their Login name and email address.
Note: IIS Integrated Authentication : If you are using IIS Integrated Authentication, ensure the 'Login Name' you specify matches the user's Windows login name in
domain\usernameformat. Client Certificate Authentication : If you are using Client Certificate authentication, ensure the 'Login Name' you specify matches the login value within the user's certificate. If you are using Vantage In-built Authentication, you will need to create a password for each user in order for them to login to the Web Module. -
Add any additional ways the user can be identified through log files in the Additional attributes section such as IP addresses, computer names, and authenticated usernames.
- The Hierarchy tab allows you to specify whether the user has either a manager or subordinates or both.
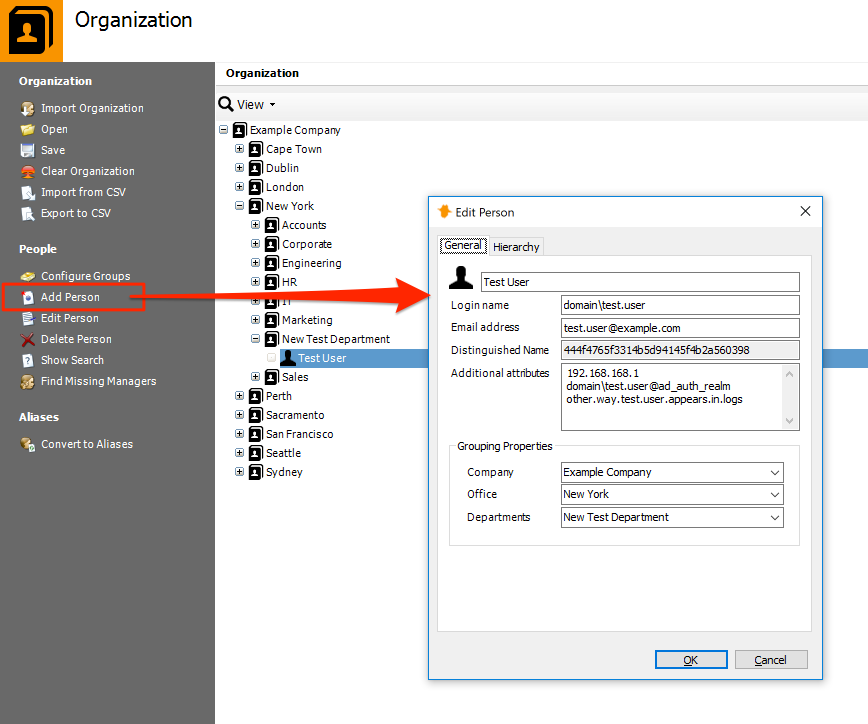
Once you have added a user you can edit that person's details or delete them from the organizational structure by using Edit Person and Delete Person respectively.
Syncronizing with the Web Module
Any time you make a change to the Organization, you need to synchronize this information with the Web Module. To do this, go to the Web Module tab and click Synchronize Web Module. Alternatively, make sure you have a Syncrhonize Web Module task action that runs regularly.